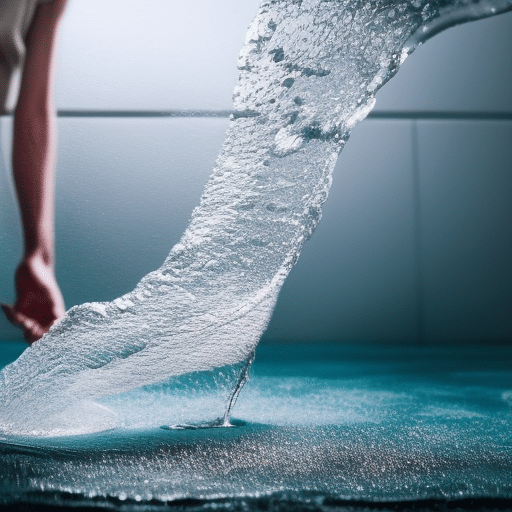
Regularly cleaning your vacuum filter is essential for maintaining the efficiency and performance of your vacuum cleaner. This section provides step-by-step instructions on how to clean different types of vacuum filters, such as foam filters, cartridge filters, and HEPA filters. Following the manufacturer’s instructions and recommendations for cleaning and replacing filters is crucial. By regularly cleaning your vacuum filter, you can improve indoor air quality and prolong the lifespan of your vacuum cleaner.
Are you tired of your vacuum not performing at its best? One of the most common reasons for reduced suction power is a dirty vacuum filter. Cleaning your vacuum filter regularly is essential to maintain optimal performance and extend the lifespan of your vacuum. In this step-by-step guide, we will walk you through the process of cleaning different types of vacuum filters, including foam, cartridge, and HEPA filters. We will explain the importance of regular cleaning, discuss the different types of filters, and provide easy techniques to clean and maintain them. Additionally, we will share tips and tricks to extend the lifespan of your vacuum filter and highlight common mistakes to avoid. By the end of this article, you will have the knowledge and resources to effectively clean and maintain your vacuum filter, ensuring your vacuum works efficiently for years to come. So, let’s dive in and learn how to clean your vacuum filter for optimal performance!
- 1. Introduction to Cleaning Vacuum Filters: A Step-by-Step Guide
- 2. The Importance of Regularly Cleaning Your Vacuum Filter
- 3. Understanding Different Types of Vacuum Filters: Foam, Cartridge, and HEPA
- 4. How to Clean Foam Filters: Easy Techniques for Optimal Performance
- 5. Step-by-Step Guide: Cleaning Cartridge Filters to Maintain Suction Power
- 6. HEPA Filters: Cleaning and Maintaining High-Efficiency Particulate Air Filters
- 7. Tips and Tricks for Extending the Lifespan of Your Vacuum Filter
- 8. Common Mistakes to Avoid When Cleaning Vacuum Filters
- 9. Additional Resources and Tools for Effective Vacuum Filter Maintenance
1. Introduction to Cleaning Vacuum Filters: A Step-by-Step Guide
Introduction to Cleaning Vacuum Filters: A Step-by-Step Guide
Cleaning your vacuum filter is an essential part of maintaining the performance and longevity of your vacuum cleaner. Over time, dirt, dust, and debris accumulate in the filter, reducing suction power and causing potential damage to the motor. Regularly cleaning your vacuum filter not only ensures optimal cleaning performance but also helps to improve indoor air quality by trapping allergens and dust particles. In this step-by-step guide, we will walk you through the process of cleaning different types of vacuum filters, including foam filters, cartridge filters, and HEPA filters.
1. Foam Filters:
Foam filters are commonly found in many upright and canister vacuum cleaners. These filters are usually washable, making them easy to clean and maintain. Here’s how you can clean a foam filter:
Step 1: Turn off and unplug your vacuum cleaner.
Step 2: Locate the foam filter, which is typically located near the dust canister or bag.
Step 3: Remove the foam filter from its housing. Refer to your vacuum cleaner’s user manual if you’re unsure how to do this.
Step 4: Rinse the foam filter under running water. Use a gentle stream of water to avoid damaging the filter.
Step 5: Gently squeeze and press the filter to remove any trapped dirt and debris. Continue rinsing until the water runs clear.
Step 6: Set the foam filter aside to air dry completely. Do not reinstall the filter until it is completely dry.
Step 7: Once dry, reinsert the foam filter back into its housing, ensuring it is properly seated.
2. Cartridge Filters:
Cartridge filters are commonly found in both upright and canister vacuum cleaners. These filters are typically made of pleated paper or fabric and are not washable. Follow these steps to clean a cartridge filter:
Step 1: Turn off and unplug your vacuum cleaner.
Step 2: Locate the cartridge filter, which is usually positioned near the motor or in the dust canister.
Step 3: Remove the cartridge filter from its housing. Refer to your vacuum cleaner’s user manual for specific instructions.
Step 4: Tap the filter gently against a hard surface to dislodge any loose dirt and debris. Alternatively, you can use a soft brush to sweep away the dirt.
Step 5: If the filter is clogged or heavily soiled, it may need replacement rather than cleaning. Check the manufacturer’s recommendations for filter replacement intervals.
Step 6: Once cleaned or replaced, reinstall the cartridge filter back into its housing, ensuring it is properly seated.
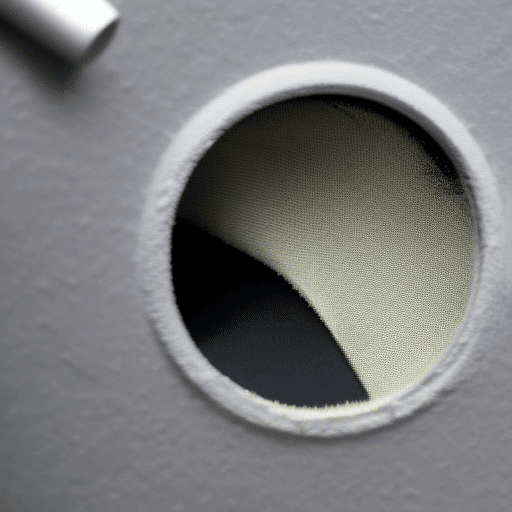
3. HEPA Filters:
HEPA (High-Efficiency Particulate Air) filters are designed to capture microscopic particles and are commonly used in vacuum cleaners for allergy and asthma sufferers. Cleaning HEPA filters is crucial to maintain their efficiency. Here’s how to clean a HEPA filter:
Step 1: Turn off and unplug your vacuum cleaner.
Step 2: Locate the HEPA filter, which is often found near the motor or in a separate compartment.
Step 3: Remove the HEPA filter from its housing. Refer to your vacuum cleaner’s user manual for specific instructions.
Step 4: Use a soft brush or gently tap the filter to remove loose dirt and debris. Avoid using water or cleaning solutions on HEPA filters, as it may damage their effectiveness.
Step 5: If the HEPA filter is visibly dirty or damaged, it may need replacement rather than cleaning. Check the manufacturer’s recommendations for filter replacement intervals.
Step 6: Once the filter is cleaned or replaced, reinstall it back into its housing, ensuring it is properly seated.
By following these step-by-step instructions, you can ensure that your vacuum filter stays clean and your vacuum cleaner operates at its best. Regularly cleaning and maintaining your vacuum filter will not only improve its performance but also prolong the lifespan of your vacuum cleaner. Remember to consult your vacuum cleaner’s user manual for specific instructions and recommendations regarding filter cleaning and replacement intervals.
2. The Importance of Regularly Cleaning Your Vacuum Filter
Regularly cleaning your vacuum filter is essential for maintaining the efficiency and performance of your vacuum cleaner. Over time, dust, dirt, and debris accumulate in the filter, causing it to become clogged. This can lead to a decrease in suction power, reduced airflow, and even damage to the motor.
One of the primary reasons for cleaning your vacuum filter is to ensure that it continues to effectively trap and contain dust and allergens. Foam filters, cartridge filters, and HEPA filters all play a crucial role in capturing and filtering out microscopic particles, including pollen, pet dander, and dust mites. If the filter is dirty and clogged, these particles can escape back into the air, making your indoor environment less clean and potentially triggering allergies or respiratory issues.
Regularly cleaning your vacuum filter also helps to prolong its lifespan. When the filter is clean and free from debris, the vacuum cleaner can operate smoothly, preventing unnecessary strain on the motor. A clean filter allows for better airflow, which in turn enhances the overall performance and efficiency of the vacuum cleaner. By regularly cleaning and maintaining your vacuum filter, you can extend the life of your machine and avoid costly repairs or replacements.
It is important to note that different types of vacuum filters require different cleaning methods. Foam filters can usually be rinsed with water and mild detergent, but be sure to check the manufacturer’s instructions. Cartridge filters may need to be gently tapped or brushed to remove the dirt, while HEPA filters often require replacement rather than cleaning.
By taking the time to regularly clean your vacuum filter, you can ensure that your vacuum cleaner continues to operate at its best, providing you with clean and fresh indoor air. So, make it a habit to clean your vacuum filter according to the manufacturer’s recommendations, and enjoy the benefits of a cleaner and healthier home.
3. Understanding Different Types of Vacuum Filters: Foam, Cartridge, and HEPA
When it comes to cleaning your vacuum filter, it’s important to understand the different types of filters that are commonly used. By knowing the specifics of each filter, you can ensure that you clean it properly and maintain its effectiveness. Three common types of vacuum filters are foam filters, cartridge filters, and HEPA filters.
Foam filters, as the name suggests, are made of a porous foam material. They are typically found in older vacuum models or in smaller handheld vacuums. Foam filters are known for their ability to trap larger particles such as dust and debris. To clean a foam filter, start by removing it from the vacuum. Gently tap it against a hard surface to dislodge any loose dirt. Next, rinse the filter under running water until it is clean. Allow it to air dry completely before placing it back into the vacuum.
Cartridge filters are a more common type of filter found in modern vacuums. They are typically made of a pleated fabric material that effectively captures smaller particles. To clean a cartridge filter, begin by removing it from the vacuum. Use a soft brush or your vacuum’s cleaning attachment to gently brush away any loose dirt or debris. Next, rinse the filter under running water until it is clean. Allow it to air dry completely before reattaching it to the vacuum.
HEPA filters, or High Efficiency Particulate Air filters, are the most advanced type of vacuum filter. They are capable of trapping microscopic particles as small as 0.3 microns. HEPA filters are commonly used in vacuums designed for allergy sufferers or in industrial settings. Cleaning a HEPA filter is similar to cleaning a cartridge filter. Remove it from the vacuum, brush away any loose dirt, rinse it under running water, and allow it to air dry completely before reinserting it into the vacuum.
It’s worth noting that not all vacuum filters are washable. Some filters are disposable and need to be replaced when they become dirty or clogged. Check the manufacturer’s instructions or the label on the filter itself to determine if it is washable or disposable. If it is disposable, make sure to purchase the correct replacement filter when needed.
Understanding the different types of vacuum filters is crucial for maintaining the performance and longevity of your vacuum. By properly cleaning and caring for your vacuum filter, you can ensure that your vacuum continues to effectively remove dirt and debris from your home. Remember to clean your vacuum filter regularly, following the manufacturer’s recommendations, to keep your vacuum running smoothly and efficiently.
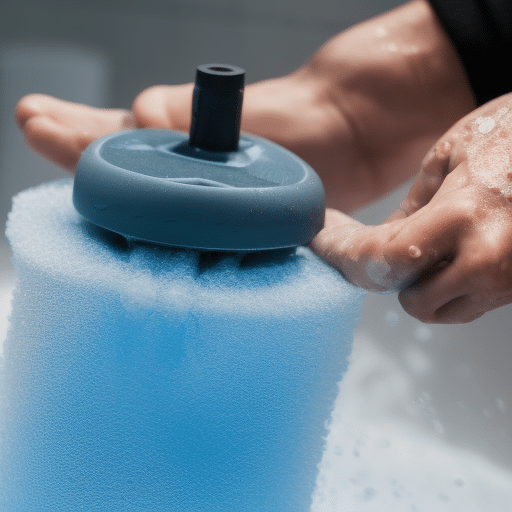
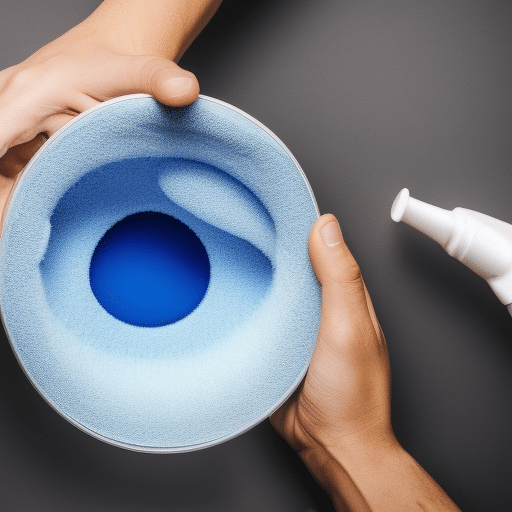
4. How to Clean Foam Filters: Easy Techniques for Optimal Performance
Foam filters are commonly found in many vacuum cleaners, and they play a crucial role in maintaining optimal performance. Over time, these filters can become clogged with dirt, dust, and debris, which can hinder the suction power of your vacuum. To ensure your vacuum continues to work efficiently, it’s important to clean the foam filter regularly. Here are some easy techniques to help you clean your foam filter effectively:
1. Remove the filter: Start by unplugging your vacuum cleaner and locating the foam filter. In most cases, the foam filter is located near the dust canister or bag. Carefully remove the filter from its housing, taking note of how it is positioned.
2. Shake off loose debris: Take the foam filter outside or over a trash can and gently shake it to remove any loose dirt or debris. This step will help eliminate larger particles that may be trapped in the filter.
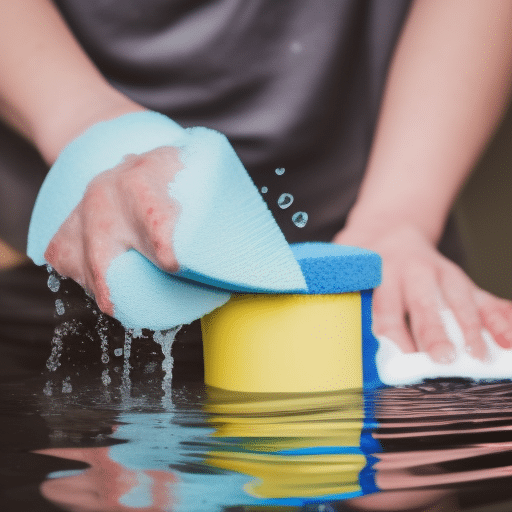
3. Rinse with water: Fill a sink or basin with warm water and add a small amount of mild detergent. Submerge the foam filter in the soapy water and gently agitate it to remove dirt and grime. Avoid using hot water, as it can damage the filter’s structure. Allow the filter to soak for about 15 minutes.
4. Rinse thoroughly: After soaking, remove the foam filter from the soapy water and rinse it thoroughly under running water. Make sure to rinse both sides of the filter to remove any remaining detergent or residue. Continue rinsing until the water runs clear.
5. Dry the filter: Gently squeeze out excess water from the foam filter, being careful not to wring or twist it. Place the filter on a clean towel or absorbent surface and allow it to air dry completely. Avoid using heat sources or direct sunlight, as they can cause the foam to deteriorate.
6. Reinstall the filter: Once the foam filter is completely dry, carefully reinstall it back into its housing. Ensure that the filter is properly aligned and securely in place before closing the vacuum cleaner.
Cleaning your foam filter regularly is essential for maintaining the performance and longevity of your vacuum cleaner. Aim to clean the filter at least once a month or more frequently if you have pets or frequently vacuum heavily soiled areas. By following these easy techniques, you can keep your foam filter in optimal condition and ensure your vacuum continues to operate efficiently.
Remember, different vacuum cleaners may have specific instructions for cleaning foam filters, so always refer to your vacuum’s manual for any manufacturer recommendations. Additionally, if your foam filter is damaged or excessively worn, it may be necessary to replace it with a new one to maintain the vacuum’s performance.
5. Step-by-Step Guide: Cleaning Cartridge Filters to Maintain Suction Power
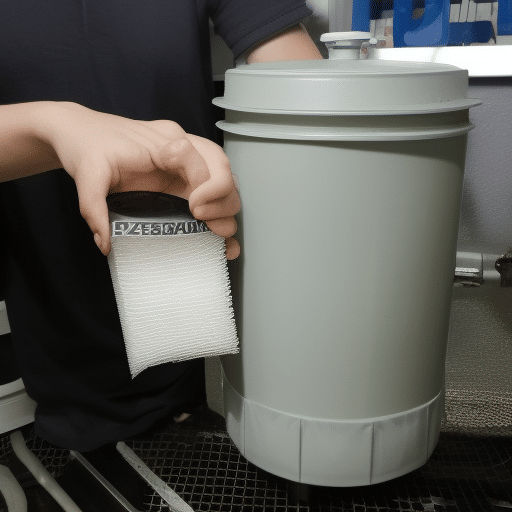
Cleaning the vacuum filter is an essential maintenance task to ensure optimum suction power and the longevity of your vacuum cleaner. One of the most common types of vacuum filters is the cartridge filter, which is typically found in bagless vacuum cleaners. Cleaning cartridge filters regularly can prevent clogs and maintain the efficiency of your vacuum. Follow this step-by-step guide to clean your cartridge filter and maintain its suction power:
Step 1: Gather the necessary tools and materials.
Before you start cleaning the cartridge filter, gather the following items: a clean, empty bucket or basin, mild dish soap, warm water, a soft-bristle brush or toothbrush, and a clean cloth or towel.
Step 2: Prepare the filter for cleaning.
Start by removing the cartridge filter from the vacuum cleaner according to the manufacturer’s instructions. It is usually located near the dust collection bin or behind a cover. Take a moment to inspect the filter for any visible debris or large particles, and remove them manually if possible.
Step 3: Rinse the filter with water.
Take the cartridge filter to a sink or an outdoor area and rinse it thoroughly with warm water. Make sure to rinse both sides of the filter to remove any loose dirt or dust. Avoid using hot water, as it may damage the filter or compromise its integrity.
Step 4: Clean the filter with mild dish soap.
Fill a bucket or basin with warm water and add a small amount of mild dish soap. Submerge the cartridge filter in the soapy water and gently agitate it to loosen any stubborn dirt or debris. Use a soft-bristle brush or toothbrush to scrub the filter gently, paying attention to the pleats and crevices where dirt can accumulate.
Step 5: Rinse and dry the filter.
Once you have thoroughly cleaned the cartridge filter, rinse it again with clean water to remove any soap residue. Ensure that all traces of soap are gone, as any left behind can cause foaming during future vacuuming. After rinsing, gently squeeze out excess water from the filter.
Step 6: Allow the filter to air dry completely.
Place the cartridge filter on a clean cloth or towel and allow it to air dry completely. It is crucial to ensure that the filter is thoroughly dry before reinstalling it in the vacuum cleaner. Damp filters can lead to mold or mildew growth, which can compromise the air quality and performance of your vacuum cleaner.
Step 7: Reinstall the filter.
Once the filter is completely dry, carefully reinstall it in the vacuum cleaner following the manufacturer’s instructions. Ensure that it is securely in place before using the vacuum cleaner again.
By following these simple steps and regularly cleaning your cartridge filter, you can maintain the suction power of your vacuum cleaner and prolong its lifespan. Remember to check the manufacturer’s guidelines for specific cleaning instructions, as some filters may require different maintenance methods.
6. HEPA Filters: Cleaning and Maintaining High-Efficiency Particulate Air Filters
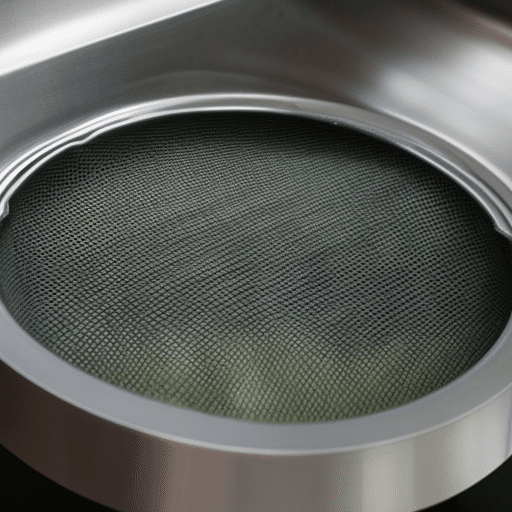
HEPA Filters: Cleaning and Maintaining High-Efficiency Particulate Air Filters
HEPA filters, also known as High-Efficiency Particulate Air filters, are an essential component of many modern vacuum cleaners. These filters are designed to capture and trap even the smallest particles, such as dust, pollen, pet dander, and other allergens. To ensure optimal performance and prolong the lifespan of your HEPA filter, regular cleaning and maintenance are necessary.
Here are the steps to clean and maintain your HEPA filter:
1. Check the manufacturer’s instructions: Before cleaning your HEPA filter, it’s important to refer to the vacuum cleaner’s user manual or the manufacturer’s guidelines. Different vacuum models may have specific instructions or requirements for cleaning and maintaining their HEPA filters.
2. Remove the filter: Most vacuum cleaners have easily accessible filter compartments that can be opened or detached. Locate the compartment and carefully remove the HEPA filter. Take note of its position or orientation to ensure proper reassembly later.
3. Shake or tap to remove loose debris: Start by gently tapping or shaking the HEPA filter to dislodge any loose debris or particles. This step helps eliminate larger particles that may be trapped on the surface.
4. Rinse with water (if applicable): Some HEPA filters can be rinsed with water to remove stubborn dirt and buildup. However, not all HEPA filters are washable, so it’s crucial to check the manufacturer’s instructions. If rinsing is allowed, use lukewarm water and gently rinse the filter under a faucet. Avoid using hot water or harsh chemicals as they can damage the filter’s effectiveness.
5. Allow the filter to dry: After rinsing, it’s essential to let the HEPA filter dry completely before reinserting it into the vacuum cleaner. Place the filter on a clean, dry surface and allow it to air dry naturally. Avoid using heat sources or direct sunlight, as excessive heat can cause damage.
6. Reassemble and reinstall the filter: Once the HEPA filter is dry, carefully reassemble it according to the manufacturer’s instructions. Ensure that it is securely attached or placed back into the filter compartment. Double-check that it is correctly aligned to prevent any air leaks.
7. Regular maintenance: To keep your HEPA filter in optimal condition, it’s recommended to clean it at least once every three to six months, depending on usage. However, if you notice a significant decrease in suction power or the filter appears visibly dirty, it may require more frequent cleaning. Regularly inspect the filter for signs of damage or wear, and replace it if necessary.
Remember, proper maintenance and cleaning of your HEPA filter are essential for maintaining the efficiency and performance of your vacuum cleaner. By following these steps and referring to the manufacturer’s guidelines, you can ensure that your HEPA filter continues to effectively capture airborne particles and improve the air quality in your home.
7. Tips and Tricks for Extending the Lifespan of Your Vacuum Filter
7. Tips and Tricks for Extending the Lifespan of Your Vacuum Filter
Keeping your vacuum filter clean is essential for maintaining optimal performance and prolonging its lifespan. Here are some helpful tips and tricks to ensure your vacuum filter stays in top shape:
1. Regular Cleaning: Depending on the frequency and intensity of your vacuuming, it is recommended to clean your vacuum filter at least once a month. However, if you have pets, allergies, or frequently vacuum fine dust, you may need to clean it more frequently.
2. Follow Manufacturer’s Instructions: Different vacuum filters have specific cleaning requirements. Always refer to your vacuum’s user manual or manufacturer’s instructions to understand the appropriate cleaning method for your particular filter type. This will help prevent any damage or voiding of warranties.
3. Pre-Cleaning: Before cleaning your vacuum filter, remove any loose dirt or debris from the filter, as this can clog it during the cleaning process. Use a soft brush or tap the filter gently to dislodge the larger particles.
4. Foam Filters: Foam filters are commonly found in many vacuums and can be rinsed with warm water and mild detergent. Ensure the filter is completely dry before reinserting it into the vacuum. Do not use excessive force while cleaning as it may damage the filter’s structure.
5. Cartridge Filters: Cartridge filters are often washable, but it is essential to check the manufacturer’s instructions. Most can be rinsed under running water or soaked in warm, soapy water. Allow the filter to air dry completely before reinstalling it.
6. HEPA Filters: High-Efficiency Particulate Air (HEPA) filters are excellent at capturing microscopic particles, but they require special care. Some HEPA filters are washable, while others are not. If washable, follow the manufacturer’s instructions for cleaning. If not washable, replacement is typically recommended.
7. Replacement Schedule: Despite regular cleaning, vacuum filters have a finite lifespan. Foam and cartridge filters may need to be replaced every six months to a year, depending on usage. HEPA filters usually last longer, but they still require periodic replacement to maintain optimal filtration performance.
By following these tips and tricks, you can extend the lifespan of your vacuum filter and ensure your vacuum continues to deliver efficient cleaning performance. Remember, a clean filter not only improves suction power but also helps maintain indoor air quality by trapping allergens and dust particles effectively.
8. Common Mistakes to Avoid When Cleaning Vacuum Filters

When it comes to cleaning vacuum filters, there are a few common mistakes that people often make. Avoiding these errors will ensure that your vacuum filter is properly cleaned and maintained, allowing for optimal performance and longevity. Here are eight common mistakes to avoid when cleaning vacuum filters:
1. Skipping the manufacturer’s instructions: Each vacuum filter is unique, and it’s important to follow the specific cleaning instructions provided by the manufacturer. These instructions will guide you on the appropriate cleaning methods and frequency.
2. Not checking for clogs: Before cleaning the filter, it’s essential to check for any clogs or debris that may be blocking the airflow. Clearing any obstructions will improve the efficiency of the cleaning process.
3. Neglecting to empty the vacuum: Before removing the filter, make sure to empty the vacuum’s dirt canister or replace the bag if necessary. This step prevents any dirt or debris from contaminating the clean filter during the cleaning process.
4. Using excessive force: When cleaning foam filters or cartridge filters, avoid applying excessive pressure or squeezing too hard. This can cause damage to the filter material and reduce its effectiveness.
5. Not allowing filters to fully dry: After cleaning the filter, make sure to let it air dry completely before reinstalling it in the vacuum. Placing a damp filter back into the vacuum can lead to mold or mildew growth, which can negatively impact its performance.
6. Using harsh chemicals: Avoid using harsh chemicals or cleaning agents when cleaning vacuum filters, especially HEPA filters. These filters are delicate and can be easily damaged by strong chemicals. Instead, use mild soap and water or follow the manufacturer’s recommendations for cleaning solutions.
7. Ignoring the filter replacement schedule: Vacuum filters have a lifespan, and it’s important to replace them as recommended by the manufacturer. Ignoring the recommended replacement schedule can result in reduced suction power and decreased filtration efficiency.
8. Not wearing protective gear: Some vacuum filters, especially HEPA filters, may contain harmful particles or allergens. When cleaning the filter, it is advisable to wear gloves and a dust mask to protect yourself from any potential respiratory irritants.
By avoiding these common mistakes, you can ensure that your vacuum filters are effectively cleaned and maintained. Regularly cleaning and replacing filters will not only improve the performance of your vacuum but also contribute to a cleaner and healthier home environment.
9. Additional Resources and Tools for Effective Vacuum Filter Maintenance
9. Additional Resources and Tools for Effective Vacuum Filter Maintenance
Maintaining your vacuum filter is essential for efficient cleaning and prolonging the lifespan of your vacuum cleaner. In addition to the basic cleaning steps mentioned earlier, there are some additional resources and tools that can help you properly maintain your vacuum filter. These resources and tools include:
1. Foam filters: Foam filters are common in many vacuum cleaners, and they play a crucial role in trapping fine dust particles. Over time, foam filters can become clogged and less effective. To clean a foam filter, gently remove it from the vacuum cleaner and rinse it under running water until the water runs clear. Allow the filter to air dry completely before putting it back in the vacuum cleaner.
2. Cartridge filters: Cartridge filters are often found in larger, more powerful vacuum cleaners. They are made of pleated material that traps dust and debris. To clean a cartridge filter, remove it from the vacuum cleaner and gently tap it against a hard surface to dislodge any loose dirt. Use a soft brush or a vacuum cleaner attachment to remove stubborn dirt. If the filter is extremely dirty, you may need to wash it with mild soap and water. Be sure to thoroughly dry the filter before reinserting it into the vacuum cleaner.
3. HEPA filters: High-Efficiency Particulate Air (HEPA) filters are the most efficient filters available and are capable of trapping 99.97% of particles as small as 0.3 microns. These filters are commonly found in vacuums designed for allergy and asthma sufferers. To clean a HEPA filter, check the manufacturer’s instructions as some filters are not washable. If it is washable, rinse it gently with water and allow it to dry completely before reinstalling it in the vacuum cleaner.
4. Filter cleaning brushes: Filter cleaning brushes are specifically designed to clean and remove debris from vacuum filters. These brushes have soft bristles that effectively dislodge dirt without damaging the filter. They are especially useful for cleaning foam and cartridge filters.
5. Compressed air: Compressed air can be used to blow out dust and debris from hard-to-reach areas of the filter. Be cautious while using compressed air to avoid damaging the filter or releasing the trapped particles into the air.
6. Replacement filters: Over time, vacuum filters may wear out or become damaged. It is important to regularly check the condition of your filters and replace them when necessary. Always refer to the manufacturer’s guidelines to ensure you purchase the correct replacement filters for your specific vacuum cleaner model.
By utilizing these additional resources and tools, you can effectively maintain and clean your vacuum filter, ensuring optimal performance and extending the life of your vacuum cleaner. Remember to consult your vacuum cleaner’s user manual and follow the manufacturer’s instructions for the best results.
In conclusion, regularly cleaning your vacuum filter is essential for maintaining optimal performance and prolonging the lifespan of your vacuum. By following the step-by-step guide provided in this article, you can effectively clean foam, cartridge, and HEPA filters. Remember to avoid common mistakes and utilize additional resources and tools for effective vacuum filter maintenance. By taking the time to clean your vacuum filter, you can ensure that your vacuum continues to provide powerful suction and effectively remove dust and allergens from your home. So don’t neglect this important task, and enjoy a cleaner and healthier living environment.