
Are you tired of spending hours trying to straighten your hair with a flat iron? Look no further, because we have the ultimate guide for you! In this article, we will teach you how to straighten your hair with a blow dryer, a quick and effective method that will give you sleek and straight locks in no time. Whether you are a beginner or a seasoned DIY enthusiast, our step-by-step tutorial will walk you through the process, ensuring beautiful results every time. We will also dive into the science behind hair straightening with a blow dryer, unlocking the secrets to achieving smooth and frizz-free hair. Additionally, we will share expert tips and tricks to help you master the art of blow dryer hair straightening, so you can straighten like a pro. Safety is always a priority, so we will provide essential precautions and best practices to ensure you straighten your hair safely. Say goodbye to frizz and hello to stunning, straight hair with our beginner’s guide to straightening hair using a blow dryer. Let’s dive in and discover the secrets to achieving salon-worthy results from the comfort of your own home.
- 1. “The Ultimate Guide: How to Straighten Hair with a Blow Dryer”
- 2. “Step-by-Step Tutorial: Achieving Sleek and Straight Hair with a Blow Dryer”
- 3. “Mastering the Art of Hair Straightening: Your Comprehensive Blow Dryer Technique”
- 4. “Straighten Like a Pro: Expert Tips and Tricks for Stunning Hair with a Blow Dryer”
- 5. “Say Goodbye to Frizz: How to Get Smooth and Straight Hair Using a Blow Dryer”
- 6. “Unlocking the Secrets: Understanding the Science Behind Hair Straightening with a Blow Dryer”
- 7. “Beginner’s Guide to Straightening Hair: A Blow Dryer Method for Beautiful Results”
- 8. “Straighten Safely: Essential Precautions and Best Practices for Blow Dryer Hair Straightening”
1. “The Ultimate Guide: How to Straighten Hair with a Blow Dryer”
The Ultimate Guide: How to Straighten Hair with a Blow Dryer
If you’re tired of dealing with frizzy or unruly hair, using a blow dryer to straighten your locks can be a game-changer. This handy tool not only helps you dry your hair quickly but also allows you to achieve sleek, straight hair with minimal effort. In this ultimate guide, we will walk you through the step-by-step process of straightening your hair using a blow dryer, providing you with helpful tips and techniques along the way.
Step 1: Prepare Your Hair
Before you begin straightening your hair, it’s essential to properly prepare it. Start by washing your hair with a smoothing shampoo and conditioner to enhance the straightening process. Once you’ve towel-dried your hair, apply a heat protectant spray or serum to shield your strands from excessive heat damage.
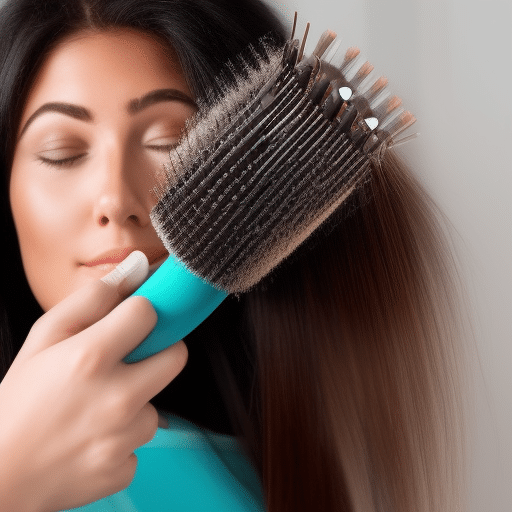
Step 2: Brush and Detangle
Using a wide-toothed comb or a detangling brush, gently remove any knots or tangles from your hair. This step is crucial as it ensures smooth and even straightening.
Step 3: Divide and Conquer
Divide your hair into manageable sections using hair clips or hair ties. Working with smaller sections makes it easier to straighten each strand thoroughly.
Step 4: Set Up Your Blow Dryer
Choose a blow dryer with a concentrator nozzle attachment. This attachment helps to direct the airflow onto specific sections of your hair, allowing for precise straightening. Set your blow dryer to medium heat and medium airflow settings, as excessive heat can damage your hair.
Step 5: Begin the Straightening Process
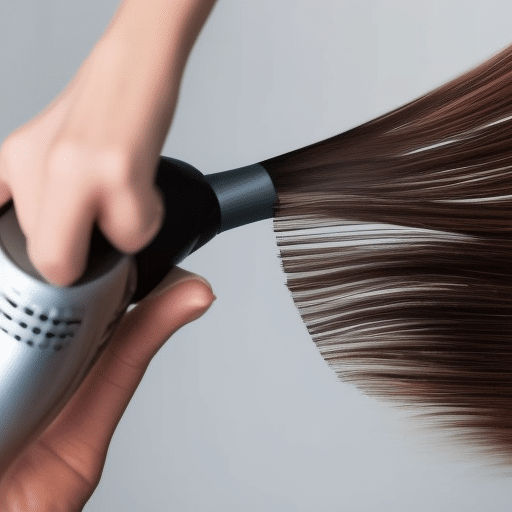
Starting with the bottom section of your hair, unclip a small portion and hold it taut. Position the concentrator nozzle near the roots of your hair and slowly glide it down along the length of the strand. Use a round brush or paddle brush to guide the hair as you move the blow dryer. Repeat this process for each section until all your hair is straightened.
Step 6: Finishing Touches
Once you’ve straightened all sections of your hair, allow it to cool down for a few minutes. This helps to set the straightened style and minimize frizz. To add extra shine and smoothness, you can apply a small amount of hair serum or oil to the ends of your hair.
Step 7: Maintain Your Straightened Hair
To make your straightened hair last longer, avoid excessive humidity or moisture. Use a satin or silk pillowcase when sleeping to prevent friction and frizz. If you notice any kinks or waves appearing throughout the day, you can touch up those areas by repeating the straightening process on those sections.
Remember, it may take some practice to perfect your blow-drying technique for straightening hair. Be patient and experiment with different brush sizes, angles, and techniques to find what works best for you.
In conclusion, using a blow dryer to straighten hair is an effective and versatile method. By following the steps outlined in this ultimate guide, you can achieve smooth, straight hair that lasts throughout the day. So, grab your blow dryer, get ready to rock those straight locks, and enjoy the confidence that comes with beautifully styled hair.
2. “Step-by-Step Tutorial: Achieving Sleek and Straight Hair with a Blow Dryer”

Step-by-Step Tutorial: Achieving Sleek and Straight Hair with a Blow Dryer
If you desire sleek and straight hair without using a flat iron, a blow dryer can be a fantastic alternative. With the right technique and tools, you can achieve salon-worthy straight hair at home. Follow this step-by-step tutorial to learn how to straighten your hair with a blow dryer.
Step 1: Prepare Your Hair
Start by washing your hair with a straightening shampoo and conditioner to smooth the hair cuticles and prepare them for the straightening process. Towel-dry your hair gently, ensuring it is slightly damp but not dripping wet.
Step 2: Apply Heat Protectant
Before exposing your hair to heat, it’s crucial to apply a heat protectant spray or serum. This will minimize damage caused by the blow dryer’s high temperatures. Distribute the protectant evenly throughout your hair, focusing on the ends and any areas prone to frizz.
Step 3: Divide Your Hair into Sections
To make the straightening process more manageable, divide your hair into several sections using hair clips or hair ties. Start by parting your hair down the middle, then create two additional sections by parting horizontally from ear to ear. Secure each section with a clip.
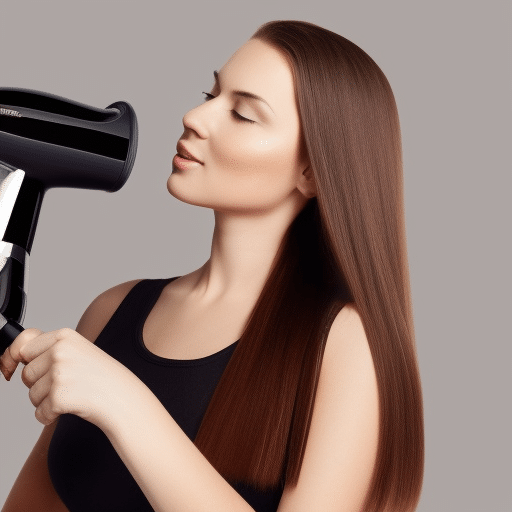
Step 4: Begin Blow Drying
Start with the bottom section of your hair and unclip it. Using a round brush, comb through a small section of hair from the roots to the ends. Hold the blow dryer above the brush and direct the airflow downward, following the path of the brush. This technique helps to smooth the hair cuticles and create a straighter look. Repeat this process for each section, working your way up to the top section.
Step 5: Use a Concentrator Nozzle
Attach a concentrator nozzle to your blow dryer to focus the heat onto specific areas of your hair. This attachment allows for more precise straightening and reduces frizz. Hold the nozzle close to your hair while combing through with a brush to achieve a sleek and straight finish.
Step 6: Cool Down
Once you have straightened all sections of your hair, switch your blow dryer to the cool air setting. Cool air helps seal the cuticles and set your straightened style. Pass the cool air over each section of hair for a few seconds before moving on to the next.
Step 7: Apply Finishing Products
To maintain the sleekness and longevity of your straightened hair, apply a small amount of hair serum or anti-frizz cream. This will add shine, reduce frizz, and keep your hair looking smooth throughout the day.
Remember, practice makes perfect, so don’t be discouraged if you don’t achieve the desired results on your first attempt. Experiment with different brush sizes and techniques to find what works best for your hair type and length.
By following this step-by-step tutorial, you can confidently straighten your hair with a blow dryer, saving time and money by skipping the flat iron. Enjoy your newfound sleek and straight hair, all accomplished through a simple DIY technique.
3. “Mastering the Art of Hair Straightening: Your Comprehensive Blow Dryer Technique”
Mastering the Art of Hair Straightening: Your Comprehensive Blow Dryer Technique
When it comes to achieving sleek, straight hair, a blow dryer can be a powerful tool in your styling arsenal. With the right technique, you can achieve salon-quality results from the comfort of your own home. In this comprehensive guide, we will walk you through the step-by-step process of using a blow dryer to straighten your hair effectively.
1. Preparing Your Hair
Before you begin, it’s important to prepare your hair for the straightening process. Start by washing your hair with a smoothing shampoo and conditioner to minimize frizz. Towel dry your hair gently to remove excess moisture, leaving it slightly damp. Applying a heat protectant spray or serum is crucial to shield your hair from damage caused by the blow dryer’s heat.
2. Sectioning Your Hair
To ensure even heat distribution and achieve the best results, it’s essential to section your hair before blow-drying. Divide your hair into manageable sections using hair clips or hair ties. Start by creating a horizontal parting at the nape of your neck and secure the remaining hair out of the way. Unclip a small section of hair from the bottom and let it hang loose.
3. Setting Up Your Blow Dryer
To straighten your hair effectively, you’ll need to use a blow dryer with a concentrator nozzle attachment. This attachment directs the airflow in a controlled manner, allowing you to focus on specific sections of hair. Attach the concentrator nozzle to your blow dryer and adjust the heat and speed settings to medium. It’s important to avoid using high heat as it can damage your hair.
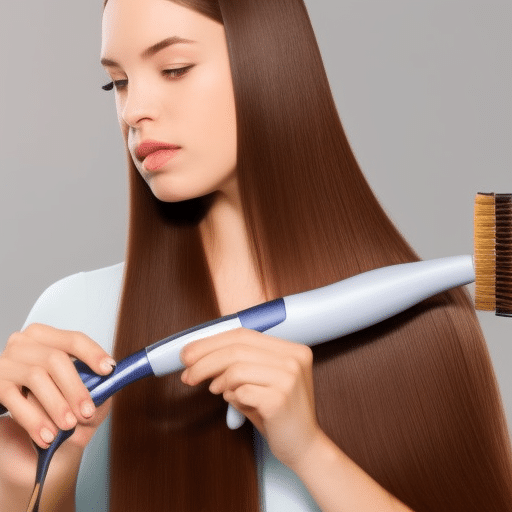
4. Blow Drying Technique
Now it’s time to start blow drying your hair. Begin with the section of hair closest to the nape of your neck. Hold the blow dryer slightly above the section and aim the nozzle downward, following the brush as you move it along the hair shaft. Use a round brush or a paddle brush, depending on your preference, to gently pull the hair taut as you blow dry. Repeat this process for each section, working your way up towards the crown of your head.
5. Finishing Touches
Once you have blow-dried all sections of your hair, it’s essential to lock in the straightened style. Allow your hair to cool for a few minutes, as this helps to set the shape and minimize frizz. If desired, you can lightly mist your hair with a hairspray or smoothing serum to add extra shine and hold.
Remember, practice makes perfect when it comes to mastering the art of hair straightening with a blow dryer. Experiment with different brush sizes and techniques to find what works best for your hair type and desired style. With time and patience, you’ll become a pro at achieving beautifully straight hair in no time.
In conclusion, by following these step-by-step instructions and utilizing the proper blow drying techniques, you can confidently straighten your hair using a blow dryer. Remember to always prioritize the health of your hair by using heat protectants and avoiding excessive heat. Now, go ahead and embrace your newfound skills to achieve the sleek, straight hair you desire.
4. “Straighten Like a Pro: Expert Tips and Tricks for Stunning Hair with a Blow Dryer”
Straighten Like a Pro: Expert Tips and Tricks for Stunning Hair with a Blow Dryer
Straightening your hair with a blow dryer can be a quick and easy way to achieve sleek, straight locks without the need for a flat iron. To help you master this technique like a pro, we’ve compiled a list of expert tips and tricks that will leave you with stunning results.
1. Start with Clean, Dry Hair: Before you begin, make sure your hair is clean and completely dry. It’s essential to remove any excess moisture to prevent frizz and ensure that your hair straightens smoothly.
2. Use a Heat Protectant: Applying a heat protectant spray or serum to your hair is crucial to protect it from the damaging effects of heat styling. This step is particularly important when using a blow dryer, as the high temperatures can cause hair to become dry and brittle over time.
3. Divide and Conquer: Sectioning your hair makes the straightening process more manageable and ensures that each strand receives equal heat distribution. Use clips or hair ties to separate your hair into smaller sections, starting from the bottom and working your way up.
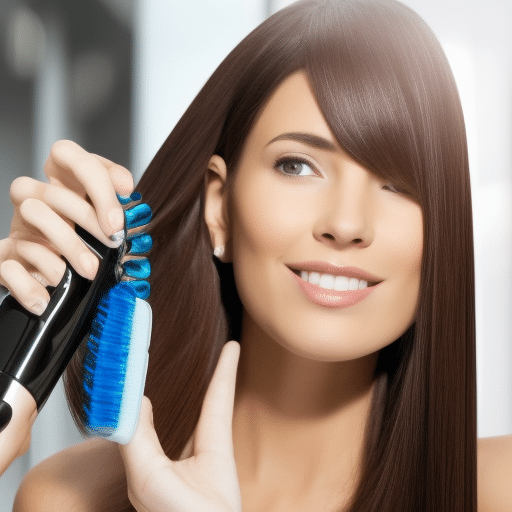
4. Choose the Right Nozzle: Most blow dryers come with a nozzle attachment that helps concentrate the airflow. Opt for a narrow nozzle to create a more focused stream of air, which will help smooth out your hair and reduce frizz.
5. Brush as You Dry: While using a blow dryer, simultaneously brush your hair with a paddle brush or a round brush. This technique helps to stretch out your hair and guide it straight as you blow dry. Start at the roots and work your way down to the ends, keeping the brush taut for a sleek finish.
6. Use the Cool Shot: Once you’ve finished blow drying a section, give it a blast of cool air using the cool shot button on your blow dryer. This helps to set the hair in its straightened position and adds shine to your locks.
7. Don’t Overheat: It’s essential to find the right balance between achieving the desired straightness and not overheating your hair. Use the lowest heat setting possible that still effectively straightens your hair to minimize damage and prevent unnecessary breakage.
8. Finish with a Smoothing Serum: After you’ve straightened your hair with a blow dryer, apply a small amount of smoothing serum or hair oil to add shine and tame any remaining frizz. Just remember to use a light hand to avoid weighing down your hair.
By following these expert tips and tricks, you’ll be able to straighten your hair like a pro using a blow dryer. Remember to practice patience and take your time, especially if you’re new to this technique. With a bit of practice, you’ll achieve stunning, salon-worthy straight hair right at home.
5. “Say Goodbye to Frizz: How to Get Smooth and Straight Hair Using a Blow Dryer”
Say Goodbye to Frizz: How to Get Smooth and Straight Hair Using a Blow Dryer
If you desire sleek, straight hair without the hassle of using a flat iron, a blow dryer can be your best friend. With the right technique and products, you can achieve smooth and straight hair that lasts all day. In this section, we will guide you through the process of using a blow dryer to straighten your hair, leaving behind frizz-free locks.
1. Prepping Your Hair:
Before you begin blow drying, it is crucial to prepare your hair properly. Start by washing your hair with a smoothing shampoo and conditioner that are designed to combat frizz. Towel-dry your hair gently, removing excess moisture without roughing up the hair cuticles.
2. Apply Heat Protectant:
To shield your hair from the damaging effects of heat, apply a heat protectant spray or serum evenly throughout your hair. This step is essential in preventing heat-related hair damage, such as breakage and split ends.
3. Section Your Hair:
Divide your hair into several sections using hair clips or hair ties. This helps you to work on one section at a time, ensuring that every strand receives equal heat distribution.
4. Choose the Right Blow Dryer:
Investing in a quality blow dryer with a nozzle attachment is crucial for achieving straight hair. The nozzle helps to concentrate the airflow, allowing for better control and smoother results. Look for a blow dryer with adjustable heat and speed settings, as well as ionic technology, which helps to minimize frizz.
5. Blow Drying Technique:
Start by selecting a section of hair and gently comb through it to remove any tangles. Hold the blow dryer with the nozzle pointing downward and follow the brush or comb with the blow dryer as you move from the roots to the ends. Keep the blow dryer at a safe distance from your hair to prevent excessive heat exposure.
6. Use a Round Brush:
To achieve a straighter look, use a round brush while blow drying. As you run the brush through your hair, follow the brush with the blow dryer, directing the airflow downwards. The tension created by the brush and heat from the blow dryer helps to straighten your hair.
7. Cool Down Your Hair:
Once a section is dry and straightened, switch to the cool setting on your blow dryer and run it through the section. This step helps to lock in the style and set your hair, reducing the chances of frizz.
8. Final Touches:
Repeat the blow drying process with each section of your hair until all sections are straightened. Once finished, run your fingers through your hair to break up any remaining sections and add a finishing touch of shine serum or oil to tame any flyaways.
By following these steps and using the right techniques, you can say goodbye to frizz and achieve smooth, straight hair using a blow dryer. Remember to be patient and take your time, as rushing the process can lead to less desirable results. With practice, you’ll become a pro at blow drying your hair for a flawless, straight style.
6. “Unlocking the Secrets: Understanding the Science Behind Hair Straightening with a Blow Dryer”
Unlocking the Secrets: Understanding the Science Behind Hair Straightening with a Blow Dryer
When it comes to achieving sleek, straight hair, a blow dryer can be a powerful tool in your arsenal. But have you ever wondered how exactly it works its magic? Let’s delve into the science behind hair straightening with a blow dryer.
Firstly, it’s important to understand the structure of our hair. Each strand is composed of three layers – the cuticle, cortex, and medulla. The cuticle, which is the outermost layer, acts as a protective barrier for the hair. When the cuticle is smooth and flat, it reflects light and gives the hair a shiny appearance. However, if the cuticle is raised or damaged, the hair can appear frizzy and dull.
Now, let’s take a closer look at how a blow dryer helps to straighten hair. When you apply heat to your hair, the high temperature breaks the hydrogen bonds within the hair strands. These bonds are responsible for the hair’s natural shape and texture. By breaking these bonds, the hair becomes more malleable and can be reshaped into a straighter form.
To maximize the straightening effect, it’s crucial to use a blow dryer with a concentrator nozzle. This attachment helps to direct the airflow in a concentrated manner, allowing you to target specific sections of hair more effectively. By focusing the heat on each section, you can ensure that the hydrogen bonds are properly broken, resulting in straighter hair.
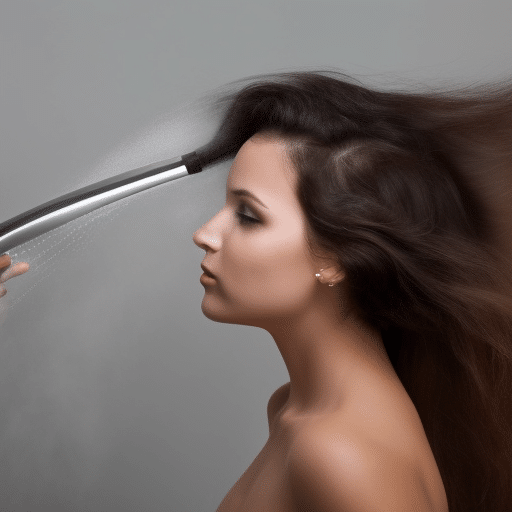
Additionally, the blow dryer’s airflow plays a significant role in the straightening process. When the hot air is directed from the roots to the ends of the hair, it helps to smooth the cuticle and seal it. This not only adds shine to your locks but also helps to maintain the straightened style for a longer duration.
However, it’s important to note that excessive heat can damage your hair. To prevent this, it’s crucial to use a blow dryer with adjustable heat settings and always start with the lowest heat setting possible. Gradually increase the temperature if needed, but be cautious not to exceed what is necessary.
In conclusion, the science behind hair straightening with a blow dryer lies in the breaking of hydrogen bonds within the hair strands. By using heat and airflow in a targeted manner, you can reshape your hair and achieve a sleek, straight look. Remember to prioritize hair health by using the right tools and techniques, and always exercise caution when applying heat to your precious locks.
7. “Beginner’s Guide to Straightening Hair: A Blow Dryer Method for Beautiful Results”
Are you tired of dealing with frizzy, unruly hair? Do you want to achieve sleek, straight locks without spending a fortune at the salon? Look no further! In this beginner’s guide, we will walk you through a simple and effective method of straightening your hair using a blow dryer. With just a few tools and some basic techniques, you can achieve beautiful results from the comfort of your own home.
Before we begin, it’s important to note that this method works best on hair that is already relatively straight or has a slight wave. If you have extremely curly or textured hair, you may need to consider other straightening methods or use additional tools such as a flat iron.
Now, let’s get started with the step-by-step process:
1. Wash and condition your hair: Start by washing and conditioning your hair with products specifically designed for straightening. This will help to smooth and prepare your hair for the straightening process.
2. Apply a heat protectant: Before subjecting your hair to heat, it’s crucial to protect it from damage. Apply a heat protectant spray or serum evenly throughout your hair, focusing on the mid-lengths and ends.
3. Towel dry your hair: Gently blot your hair with a towel to remove excess moisture. Avoid rubbing your hair vigorously, as this can cause frizz and damage.
4. Apply a straightening cream or serum: To enhance the straightening process and provide extra protection, apply a small amount of straightening cream or serum to your hair. Comb it through to ensure even distribution.
5. Divide your hair into sections: Use hair clips or hair ties to divide your hair into manageable sections. This will make the straightening process easier and more efficient.
6. Start blow drying: Begin by selecting a medium heat setting on your blow dryer. Using a round brush, grab a small section of hair and place the brush at the roots. Point the blow dryer nozzle downward, following the brush as you pull it through the hair. Repeat this process for each section, working your way from the bottom to the top.
7. Cool down and set: Once you have straightened all sections, switch your blow dryer to the cool setting. Use this cool air to set the straightened hair and seal the cuticles for a smoother finish.
8. Apply a finishing product: To add shine and prevent frizz, apply a lightweight finishing product, such as a serum or shine spray, to your hair. This will give your straightened locks a polished and professional look.
And there you have it – a beginner’s guide to straightening hair using a blow dryer. Remember to always use caution when working with heat tools and to take breaks if needed. With practice, you’ll master this technique and be able to achieve beautiful, salon-worthy straight hair in no time. Happy styling!
8. “Straighten Safely: Essential Precautions and Best Practices for Blow Dryer Hair Straightening”
Straighten Safely: Essential Precautions and Best Practices for Blow Dryer Hair Straightening
When it comes to straightening hair with a blow dryer, it is important to prioritize safety to avoid any potential damage or accidents. By following these essential precautions and best practices, you can achieve sleek and straight hair while minimizing the risk of harm:
1. Start with Clean and Dry Hair: Before using a blow dryer for hair straightening, ensure that your hair is clean and completely dry. Wet or damp hair can be more susceptible to heat damage.
2. Apply Heat Protectant: Protect your hair from excessive heat by applying a heat protectant spray or serum. This will create a barrier between your hair and the blow dryer, reducing the risk of heat-related damage.
3. Choose the Right Temperature: Most blow dryers come with adjustable heat settings. Opt for a low or medium heat setting to avoid overheating your hair. High heat can lead to dryness, frizz, and breakage.
4. Use a Concentrator Nozzle: Attach a concentrator nozzle to your blow dryer. This accessory helps to direct the airflow in a controlled manner, allowing for more precise straightening. It also reduces the likelihood of accidentally burning your scalp or skin.
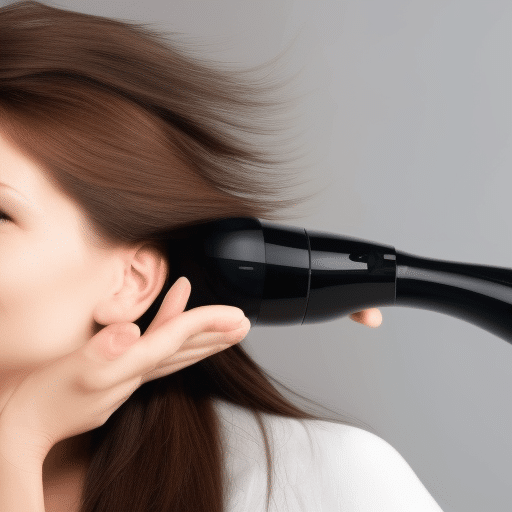
5. Maintain a Safe Distance: Keep the blow dryer at a safe distance from your hair, ideally around 6 inches. Holding it too close can cause damage and even burn your hair or scalp.
6. Keep Moving: Avoid focusing the heat on one spot for too long. Continuously move the blow dryer in a fluid motion to distribute the heat evenly and prevent any hot spots that may damage your hair.
7. Section Your Hair: Divide your hair into smaller sections using clips or hair ties. This will enable you to work on one section at a time, ensuring that each strand receives adequate heat for effective straightening.
8. Take Breaks: If you have thick or long hair, it’s important to give yourself short breaks during the straightening process. This allows your hair to cool down and reduces the risk of overheating.
By adhering to these precautions and best practices, you can safely straighten your hair using a blow dryer. Remember, it’s essential to listen to your hair and adjust the heat and timing accordingly. With practice and care, you can achieve beautiful, straight hair without compromising its health.
For more detailed instructions and visual demonstrations, please refer to the accompanying tutorial on how to straighten hair with a blow dryer.
In conclusion, mastering the art of straightening hair with a blow dryer is not only achievable but also a convenient and efficient method. By following the step-by-step tutorial and incorporating expert tips and tricks, anyone can achieve stunning, smooth, and straight hair. Understanding the science behind this technique not only enhances the results but also allows for a more personalized approach. However, it is crucial to prioritize safety by following essential precautions and best practices. With this beginner’s guide, anyone can confidently straighten their hair using a blow dryer and achieve beautiful results. Say goodbye to frizz and hello to sleek, straight locks with this ultimate guide on how to straighten hair with a blow dryer.