
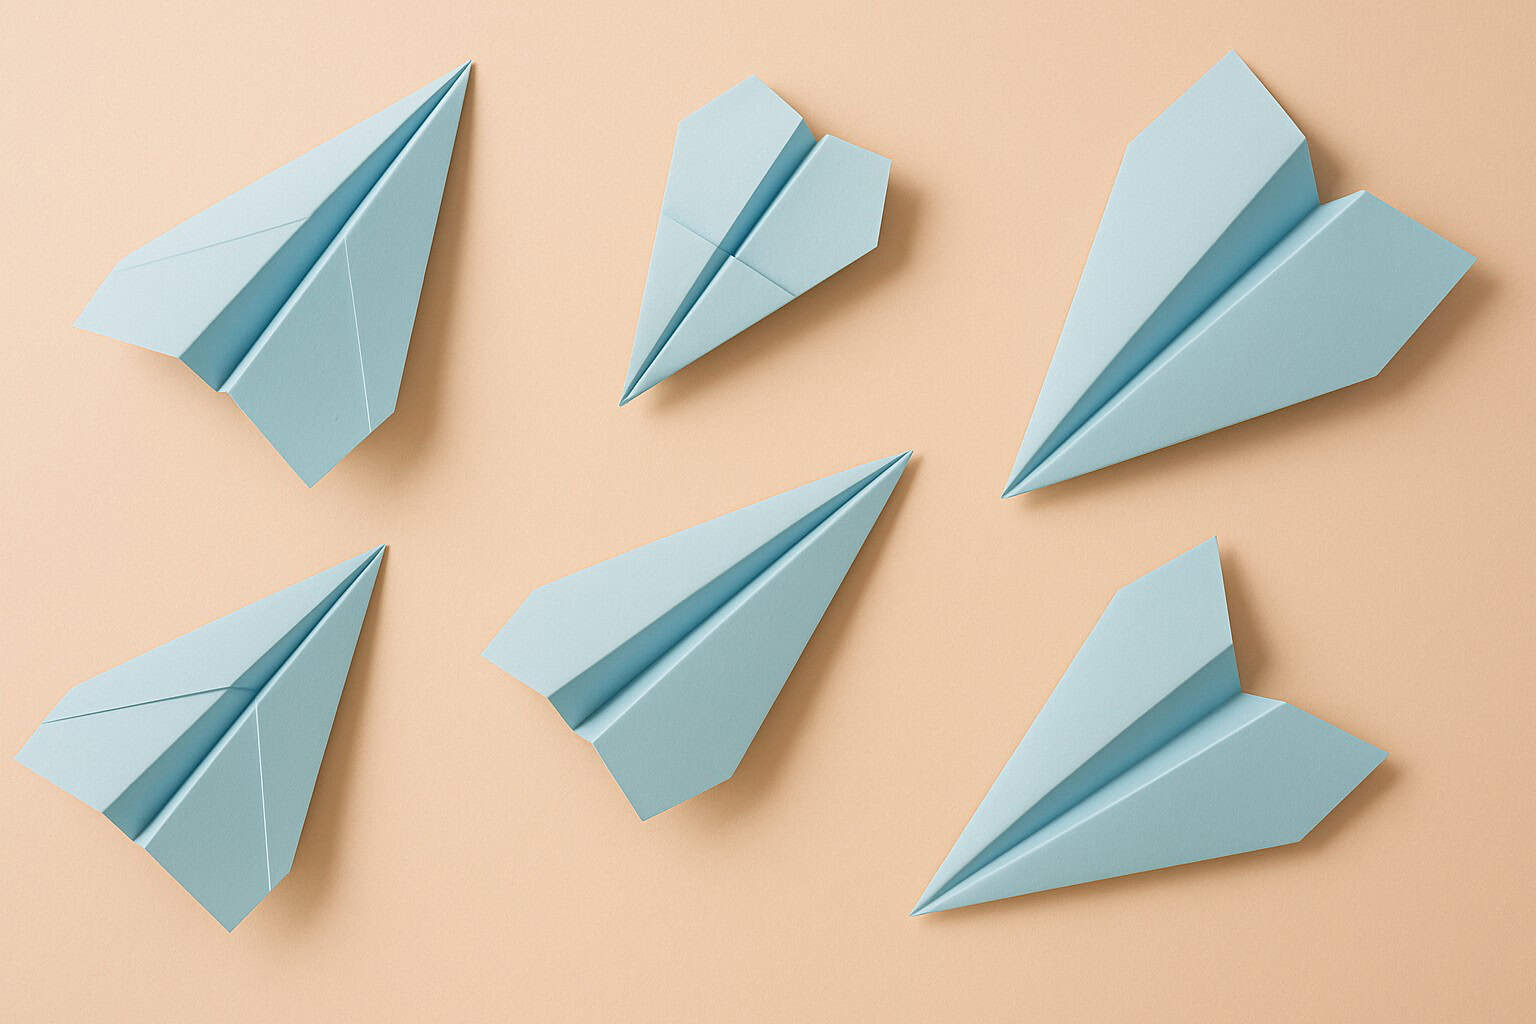
Passing down simple, hands-on skills like paper-airplane folding is a fun way to bond while teaching designs that actually fly straight and far, rather than nosediving on launch.
Below are six tested designs—ranging from easy to more advanced—that balance simplicity, distance, and glide so every skill level has something satisfying to build and fly.
Ways to Make different shapes of Paper Airplane
Ready for a simple craft that guarantees a bit of magic? Let’s turn a plain sheet of paper into a fleet of amazing flying machines. Each design has its own unique way of flying, so grab a few sheets and let’s get folding!
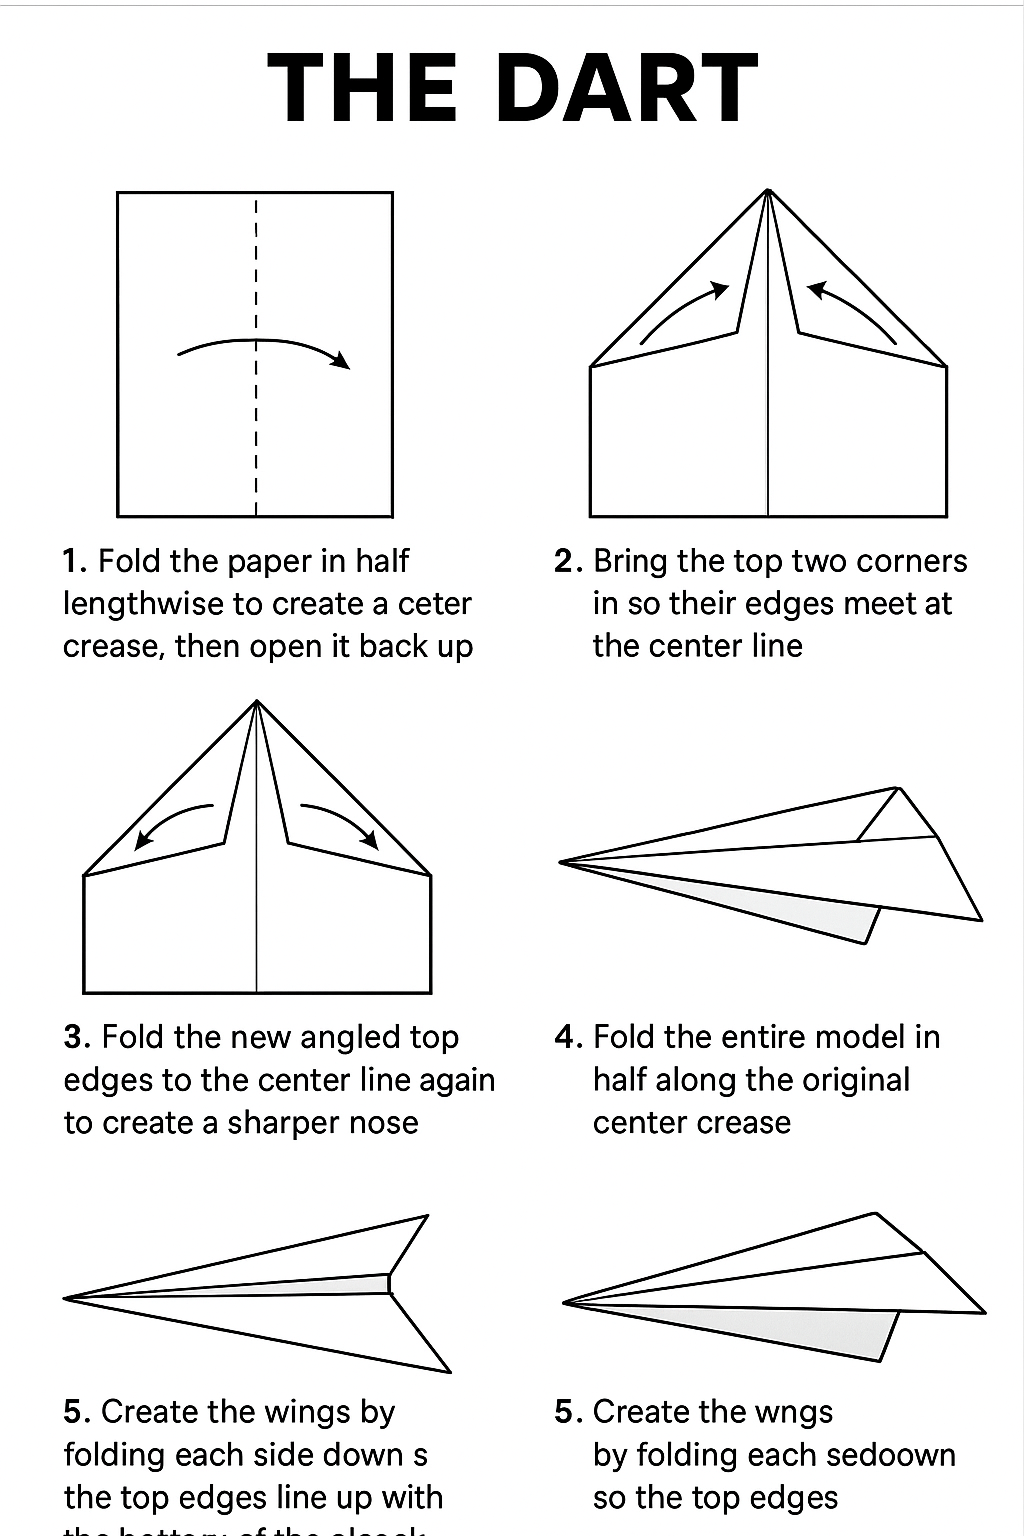
The Dart
A classic, streamlined airplane that anyone can fold quickly, making it a perfect first build for kids and parents alike.
- Fold the paper in half lengthwise to create a center crease, then open it back up.
- Bring the top two corners in so their edges meet at the center line.
- Fold the new angled top edges to the center line again to create a sharper nose.
- Fold the entire model in half along the original center crease.
- Create the wings by folding each side down so the top edges line up with the bottom of the plane’s body.
- Pro Tip: Place a small piece of double-sided tape inside the body to hold it together for more stable flights.
Paper Airplane -DART_daymoms
The Stealth
Designed for distance and sleek looks, this long-range flyer flies best when its folds are tidy and its tail wings are slightly adjusted.
- Start with a vertical center fold to create a guide, then open the paper back up.
- Fold the top corners down to meet the center line, forming a point.
- Fold the point down so its tip sits about an inch from the bottom edge of the paper.
- Bring the new top corners inward to the center line.
- Lock the flaps by folding the remaining small tip up over them.
- Fold the plane in half along the main crease.
- Fold the wings down, leaving about an inch of the body at the bottom.
- Add winglets by folding up the last half-inch of each wing’s edge.
- Cut two short slits at the back of each wing and bend the tabs up slightly to improve lift.
The Bumble
This plane is built for long, smooth glides. Symmetrical, clean folds are key to its gentle flight.
- Fold the paper in half horizontally (top to bottom), then open it flat.
- Fold the top corners inward to the center line.
- Bring the point down until it meets the edge of the previous folds.
- Fold the new upper edges to the center one more time to tighten the nose.
- Fold the top edge away from you to create a narrow, half-inch lip for stiffness.
- Fold the plane in half along the center crease.
- Create the wings by folding each side down, leaving about a half-inch of the body at the bottom.
The Hunter
A fast, front-heavy design with a reinforced nose built for speed and impressive distance.
- Begin with a vertical center fold and reopen it.
- Fold the top edge down about two inches.
- Fold that top panel down two more times, creating a thick, heavy nose.
- Flip the paper over and fold the top edges down to meet at the center line on the back.
- Fold the plane in half along the main crease.
- Shape the wings by folding them down at an angle, so they are narrower at the front and wider at the back.
- Fold up a half-inch strip along the back edge of each wing for stability.
The Stable
This design uses a few extra moves to create broad, steady wings for reliable, balanced flight. It works especially well with A4 paper.
- Fold the paper in half lengthwise and open it again.
- Fold both top corners to the middle to form a point.
- Fold the point down to square off the top, making it look like an envelope.
- Tuck the top two corners in about an inch.
- Fold the small point down over the tucked corners to lock them in place.
- Fold the plane in half along the main crease.
- Fold the wings down to create wide, even panels that are perfect for slow, steady glides.
The Glider
A large-winged glider that’s easy to fold and fun for kids to decorate and modify.
- Fold the top corners to the center to make a triangle, but don’t unfold.
- Fold the entire triangle down so its point rests on the lower half of the page.
- Fold the upper right corner diagonally to the center line, then repeat on the left.
- Flip the small triangle tip that forms below those folds up to lock them in place.
- Fold the plane in half along the original center crease.
- Fold the wings down on each side to create a large, symmetrical wingspan.
- Get creative! Kids can trim the wings or add fringe to experiment with airflow.
Pro Tips for Perfect Flights
- Make crisp folds and ensure both sides of your plane are symmetrical.
- Add a small piece of tape inside the body of your planes to keep them from coming apart in the air.
- Fine-tune your plane’s flight by slightly bending the back edges of the wings up or down to correct dives or stalls.
- Throw gently. A smooth, forward push is much more effective than a hard throw.
Now you have a whole squadron at your command. Go test them out and see which one is your favorite!